Celebrate the achievements of exceptional athletes and teams with our interactive Hall of Fame displays. Tailored to reflect your institution's rich history and spirit.
check_small
Customizable design to match school colors and branding
check_small
Easily updatable to add new inductees and achievements
check_small
Interactive elements to engage visitors and tell compelling stories
Learn More
Academic Awards
Honor academic excellence with a dynamic and interactive display of student achievements, scholarships, and notable accomplishments.
check_small
Showcase academic high achievers and scholarship recipients
check_small
Feature departmental and individual academic milestones
check_small
Integrate with school databases for real-time updates
Learn More
Record Boards
Immortalize outstanding athletic records and performances with our versatile digital record boards, ensuring lasting recognition.
check_small
Display current and historical record holders
check_small
Easy-to-update interface for new records
check_small
Engaging visuals to celebrate athletic achievements
Learn More
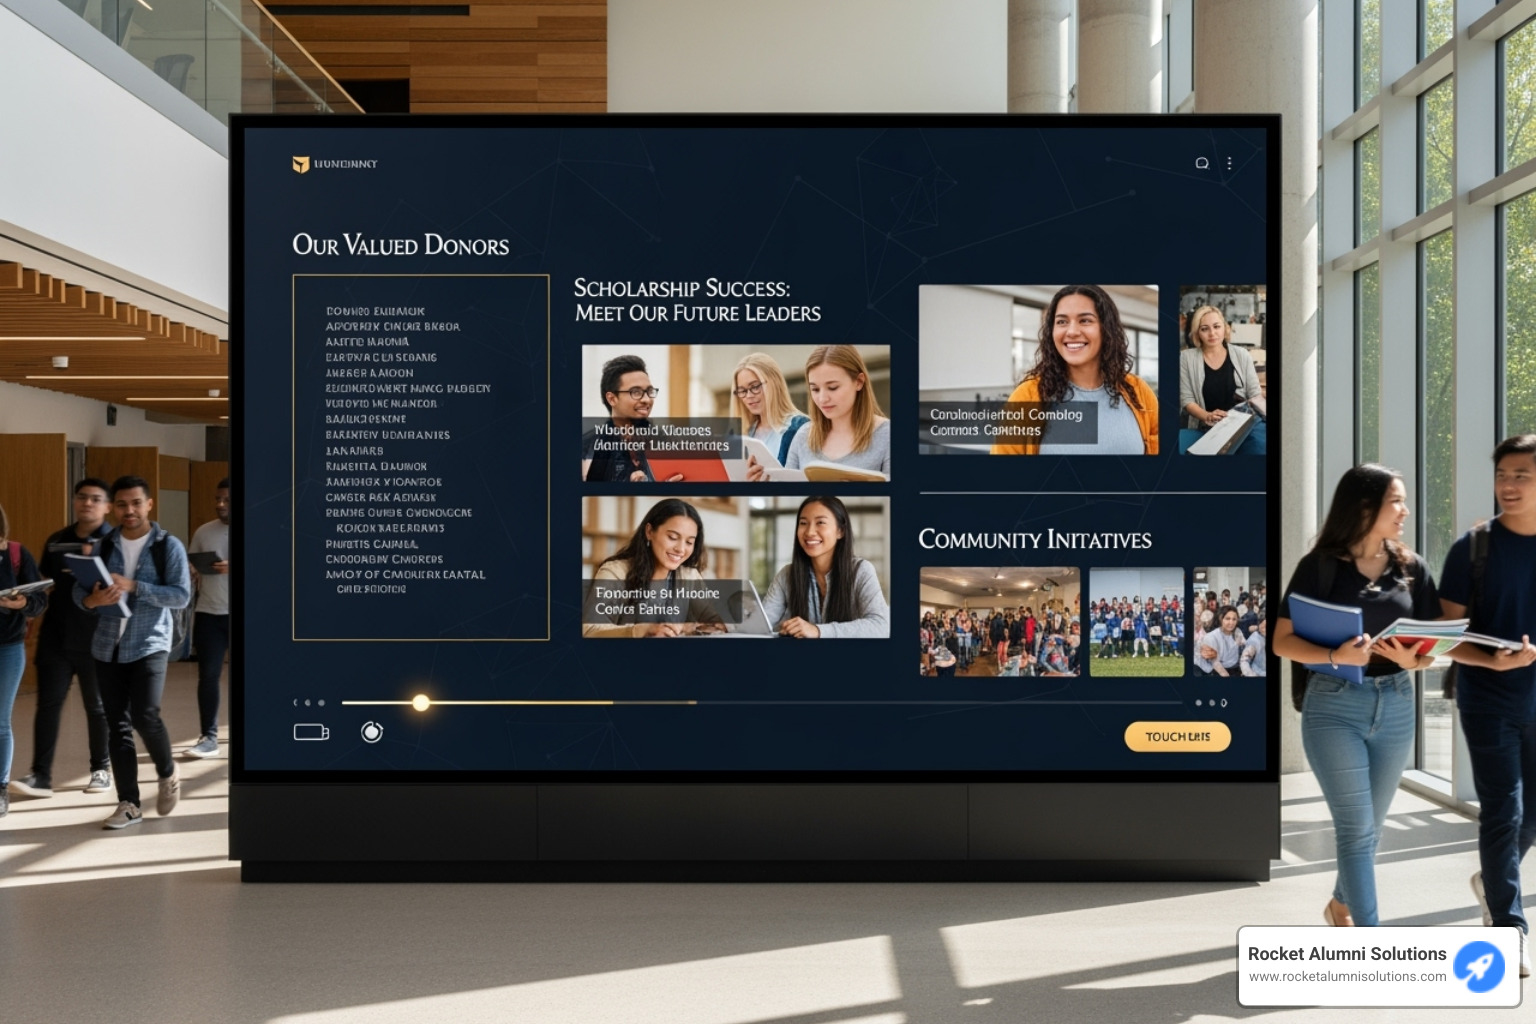
Donor Recognition
Acknowledge the generosity and impact of your donors with a dedicated and customizable digital display, fostering a culture of gratitude.
check_small
Highlight individual donors and their contributions
check_small
Incorporate donor stories and impact testimonials
check_small
Feature interactive donor walls with search functionality
Learn More
Distinguished Alumni
Showcase the success stories of your alumni, inspiring current and future students with a visually appealing and interactive alumni gallery.
check_small
Profile notable alumni with biographies and achievements
check_small
Link to alumni networks and success stories
check_small
Celebrate diverse paths and accomplishments post-graduation
Learn More
Graduation Honors
Celebrate your graduates' milestones with a dedicated display for cum laude, magna cum laude, and summa cum laude honorees.
check_small
Feature valedictorians, salutatorians, and honor graduates
check_small
Showcase graduation speeches and memorable moments
check_small
Offer a digital yearbook experience with graduate profiles
Learn More
Team History
Chronicle the journey and milestones of your sports teams, creating an engaging historical narrative with our interactive displays.
check_small
Highlight championship wins and significant games
check_small
Showcase evolution of team uniforms and logos
check_small
Include past and present team rosters and coaches
Learn More
Wall of Honor for Veterans & Service Members
Honor the bravery, service, and sacrifice of veterans and active service members with a dedicated Wall of Honor. This tribute celebrates their commitment and the impact they have made in service to our nation.
check_small
Recognize the sacrifices and achievements of veterans and military personnel
check_small
Share personal stories, service histories, and accolades
check_small
Create a respectful and engaging tribute to those who serve
Learn More
Facilities
Enhance the visitor experience at your facilities with interactive displays showcasing the history, features, and milestones of your buildings and grounds.
check_small
Provide virtual tours of your campus and facilities
check_small
Highlight renovations, expansions, and historical significance
check_small
Include donor recognition for facility contributions
Learn More
Awards
Showcase the diverse range of awards and honors received by your institution, students, and faculty in an engaging and interactive manner.
check_small
Feature departmental, athletic, and extracurricular awards
check_small
Highlight national and regional recognitions and rankings
check_small
Include interactive timelines of award achievements
Learn More
Olympians & Professional Athletes
Celebrate the extraordinary achievements of your alumni who have excelled in the Olympics or turned professional, showcasing their journey and successes.
check_small
Profile Olympians and professional athletes with their career highlights
check_small
Include achievements, accolades, and professional milestones
check_small
Share inspiring stories of dedication and triumph
Learn More
Plaques
Digitally transform traditional plaques into an interactive and dynamic format, offering a modern approach to recognition.
check_small
Convert legacy plaques into digital formats
check_small
Include detailed information and stories behind each plaque
check_small
Offer an interactive and engaging user experience
Learn More
Music & Arts
Seamlessly repurpose old content, dynamically showcase new material, and intelligently adapt to events and announcements.
check_small
Make old content relevant again by targeting specific times and audiences
check_small
On-demand video access to concerts, a powerful tool for admissions and recognition
check_small
Elevated concert promotional content and digital programs
Best resolution to scan photos for yearbook: A quick takeaway - the best resolution to scan yearbook photos is typically between 250 and 300 DPI (dots per inch). This ensures that the images look clear and detailed when printed in a yearbook. Resolution matters a lot when you want your memories to last forever in print. Here's more detail:
Digital photos: Most digital cameras capture images with sufficient resolution to be used directly; they often just need resizing.
Scanning old photos: For yearbooks, scan at a minimum of 300 DPI for clear, sharp results.
PPI vs. DPI: Understand the difference - PPI is for screens, DPI is for print.
Yearbooks serve as a time capsule, connecting a community across time. They offer a tangible sense of belonging, a cornerstone of happiness and nostalgia. The act of capturing these moments in high-quality images not only preserves them for future reflection but also strengthens the foundational tech and resource skills within a school community. This recognition and interaction foster a sense of community, pivotal for students, faculty, and staff alike. As humans, we naturally seek a sense of belonging, and through carefully preserved memories, we maintain these crucial connections, ensuring they last lifetimes. A sense of belonging brings numerous benefits, such as increased happiness, improved teamwork, and stronger relationships among children, adults, teammates, employees, faculty, and coaches. By fostering this environment, we create a positive ripple effect that enhances community spirit and personal well-being.
Understanding DPI and PPI
When it comes to scanning photos for your yearbook, understanding DPI and PPI is crucial.
What is DPI?
DPI stands for dots per inch. It's all about how many tiny dots of ink are printed per inch on a piece of paper. Think of DPI as a measure of print quality. The higher the DPI, the more detailed and sharper the printed photo will be. For example, a photo printed at 300 DPI will have 300 dots of ink per inch, making it look crisp and clear.
Here's a quick reference for DPI in printed media:
One-hour photo lab: 200 - 260 DPI
Consumer inkjet printer: 150 - 280 DPI
Glossy magazines: 180 - 240 DPI
Newspapers: 160 - 200 DPI
Billboards: 12 - 30 DPI (yes, you read that right, but they look good from afar!)
What is PPI?
On the other hand, PPI stands for pixels per inch. This term is used when we're talking about screens, like those on TVs and computer monitors. Pixels are the tiny dots that make up digital images. More pixels per inch mean higher resolution and better image clarity on your screen.
Here's how PPI looks in digital media:
40" HDTV: 48 PPI
24" monitor: 92 PPI
21" monitor: 105 PPI
Laptop (15" monitor): 141 PPI
iPhone 12 (6.1" screen): 460 PPI
Why It Matters
When preparing yearbook photos, understanding the difference between DPI and PPI is essential. DPI is what you need to focus on for printed photos, ensuring they are sharp and detailed. PPI is more relevant for digital displays, where you want images to look clear on screens.
By using the right DPI for printing, you're not just preserving memories—you're also contributing to a sense of community and belonging. Yearbooks are more than just pictures; they’re a touchstone for shared experiences and nostalgia. These images help maintain connections and foster a sense of belonging for students, faculty, and alumni. When people see themselves in print, it strengthens their bond with the community.
Creating a sense of belonging is vital for everyone—children, adults, teammates, employees, faculty, and coaches. It brings about positive secondary effects, such as increased happiness, motivation, and collaboration. Recognition and nostalgia play a crucial role in maintaining these connections, ensuring that the community thrives and individuals feel valued.
Best Resolution to Scan Photos for Yearbook
Recommended DPI Settings
When scanning photos for your yearbook, choosing the best resolution is key to ensuring high-quality prints. The right DPI (dots per inch) setting makes a big difference in how your images turn out. Here's a simple guide to help you decide:
300 DPI: This is the sweet spot for most yearbook photos. It provides crisp, clear images that are perfect for standard-sized prints. If you're not planning to enlarge the photos, 300 DPI is ideal.
600 DPI: If you might want to enlarge your photos, consider scanning at 600 DPI. This higher resolution captures more detail, making it easier to zoom in or crop without losing quality. It's also great for preserving smaller images like wallet-sized photos.
1200 DPI and 2400 DPI: These settings are overkill for typical yearbook photos, but they can be useful for very small or highly detailed images, like slides or negatives. Scanning at these resolutions ensures maximum detail, but keep in mind that file sizes will be much larger.
Factors Influencing DPI Choice
Several factors influence which DPI setting you should choose:
Photo Size: Larger photos can often get by with a lower DPI, while smaller photos benefit from a higher DPI to capture all the details.
Enlargement and Cropping: If you plan to enlarge or crop images, a higher DPI is recommended. This ensures that the image remains sharp even after editing.
Viewing Distance: Consider how the yearbook will be viewed. For images that will be seen up close, like individual portraits, a higher DPI (600) is beneficial. For group photos or background images, 300 DPI is usually sufficient.
Community Recognition: The images in your yearbook aren't just pictures; they’re a touchstone for shared memories and a sense of belonging. High-quality images help create a feeling of nostalgia and connection, which is essential for fostering community pride and recognition. A sense of belonging is crucial for everyone—children, adults, teammates, employees, faculty, and coaches alike. It brings about positive secondary effects, such as increased happiness, motivation, and collaboration. When people see themselves in these photos, it strengthens their connection to the school and each other, maintaining important bonds and creating happy nostalgia.
By choosing the right DPI, you’re not just preserving images—you’re helping to build a lasting sense of community and belonging. When the topic includes the phrase "Touchstone," think of it as an interactive touchscreen for schools and communities, enhancing engagement and connection.
File Formats for Scanning Yearbook Photos
When scanning photos for a yearbook, selecting the right file format is just as important as choosing the right DPI. Two popular formats you'll encounter are JPEG and TIFF. Each has its own strengths and weaknesses, so let's dive into what makes them different.
JPEG vs. TIFF
JPEG (Joint Photographic Experts Group) is the most common image format used for web and digital photography. It's popular because it uses lossy compression, which reduces file size by removing some image data. This makes JPEGs easy to share and store, but it can lead to a loss in image quality, especially if the file is edited and saved multiple times.
TIFF (Tag Image File Format), on the other hand, uses lossless compression. This means all the image data is preserved, resulting in higher quality images. However, TIFF files are much larger than JPEGs, which can be a downside if storage space is a concern.
Here's a quick comparison:
JPEG: Smaller file size, easier to share, some quality loss.
TIFF: Larger file size, better quality, more suitable for editing.
When to Use JPEG
JPEGs are great when you need to archive and share images easily. Their smaller file size means you can store more photos without taking up much space. They're perfect for digital yearbooks where quick loading and easy sharing are important. If your goal is to create an online yearbook that's accessible to everyone, JPEG is the way to go.
When to Use TIFF
Use TIFF files when you need high-quality prints or plan to do extensive editing. The lossless nature of TIFFs ensures that every detail is captured, making them ideal for images that require precision. If you’re preparing photos for a printed yearbook or need to maintain the highest quality for archival purposes, TIFF is your best bet.
The Importance of Community Recognition and Belonging
Yearbooks are more than just collections of photos; they are a testament to the community and the sense of belonging that schools foster. Creating a feeling of belonging is crucial for everyone—children, adults, teammates, employees, faculty, and coaches alike. A strong sense of community recognition can lead to increased happiness, motivation, and engagement. When individuals feel they belong, they are more likely to contribute positively to their environment, leading to a ripple effect of good outcomes.
Recognition and nostalgia play significant roles in maintaining connections. Yearbooks capture moments that evoke happy memories and reinforce the bonds within a community. By choosing the right file format, you ensure that these cherished memories are preserved in the best possible quality, fostering a lasting sense of belonging and community recognition.
Tips for Scanning Yearbook Photos
Scanning yearbook photos is a delicate process that requires attention to detail to ensure each image is captured beautifully. Let's explore the essential scanner settings and image editing tools you need to know about.
Scanner Settings
To achieve the best resolution to scan photos for yearbook, it's crucial to configure your scanner correctly. Here's what you need to focus on:
Resolution: Aim for a resolution of 300 DPI as a standard. This ensures sharp, clear images suitable for printing. For photos that need enlargement or high detail, consider scanning at 600 DPI or even 1200 DPI.
Color Space: Use the RGB color space for scanning. This is the default for most scanners and is compatible with digital editing tools. Don't worry about converting to CMYK; most yearbook printing processes will handle that automatically.
Scan Quality: Always select the highest quality setting your scanner offers. This often means choosing the "best" or "high" quality option in the scanner settings.
Image Editing Tools
Once your photos are scanned, the next step is to refine them using image editing tools. Here are some techniques and software options to consider:
Photoshop: A powerful tool for editing. Use the unsharp mask to improve clarity and detail. This tool sharpens edges and brings out finer details in your photos.
GIMP: A free alternative to Photoshop. It also offers similar tools for sharpening and adjusting images.
Picasa: While no longer supported by Google, it remains a simple option for basic editing tasks like cropping and adjusting brightness.
Median Filter: This is particularly useful for removing noise and smoothing out images, especially if your scanned photo has a textured appearance. It’s available in both Photoshop and GIMP.
These tools and techniques ensure that scanned photos maintain their quality and vibrancy, helping to evoke nostalgia and preserve the memories captured in each image.
Creating a yearbook is more than just compiling photos; it's about fostering a sense of community and belonging. When individuals see themselves and their peers in a yearbook, it reinforces their connection to the community, whether it's a school, team, or organization. This sense of belonging is crucial for everyone—children, adults, teammates, employees, faculty, and coaches alike. It brings about positive secondary effects such as increased happiness, motivation, and engagement.
Recognition through yearbooks also plays a vital role in creating happy nostalgia and maintaining connections. As an interactive touchscreen for schools and communities, yearbooks serve as a celebration of shared experiences and connections that last a lifetime.
Conclusion
At Rocket Alumni Solutions, we recognize the profound impact that preserving memories and fostering a sense of belonging can have on individuals and communities. Our digital yearbook services are designed to capture these cherished moments in a way that is both meaningful and accessible, ensuring that everyone feels recognized and valued.
Community recognition and the feeling of belonging are essential for all humans. They build confidence in children, strengthen bonds among teammates, and create a supportive environment for faculty and staff. When people feel a sense of belonging, they are more likely to contribute positively to their communities, leading to increased engagement, collaboration, and a shared sense of pride.
Optimal scanning is a crucial part of this process. By using the right DPI settings, you ensure that each photo is captured with clarity and detail, making them perfect for both print and digital displays. Whether it's a class photo, a sports event, or a special assembly, the right resolution ensures these memories remain vivid and engaging.
Creating a digital yearbook is about more than just preserving images; it's about preserving the stories and connections that make your community unique. When we digitize yearbooks, we help transform them into interactive Touchscreens, allowing students, faculty, and alumni to revisit moments that foster a sense of community and belonging.
As we look to the future, our digital yearbook services at Rocket Alumni Solutions aim to keep these connections alive. By combining optimal scanning techniques with our user-friendly platforms, we offer a comprehensive solution for preserving and celebrating your school's legacy.
If you're ready to take the next step in digitizing your yearbooks, partner with us today and let's create something extraordinary together.
The Solution Trusted by 1,000+ Schools
From the PGA Tour, to all levels of college athletics, to public and private high schools large and small
Carmel High
Delta County High
Fountain-Fort Carson
Stevens Point Area High
Holmen High
Rye Neck Schools
Dalton School
Carmel Catholic
St. John’s Jesuit
Cincinnati Country Day School
Gwinnett County Schools
Madison High
Summit Country Day
Marist School
Germantown Academy
Chaminade High
St. John Bosco
Phillips Exeter Academy
Brooks School
Noble and Greenough School
Official Partner of College Sports Communicators
Official Partner of the National Organization of Minority Athletic Directors
Official Alumni Recognition Partner of the National Executive Directors Council
view_comfy
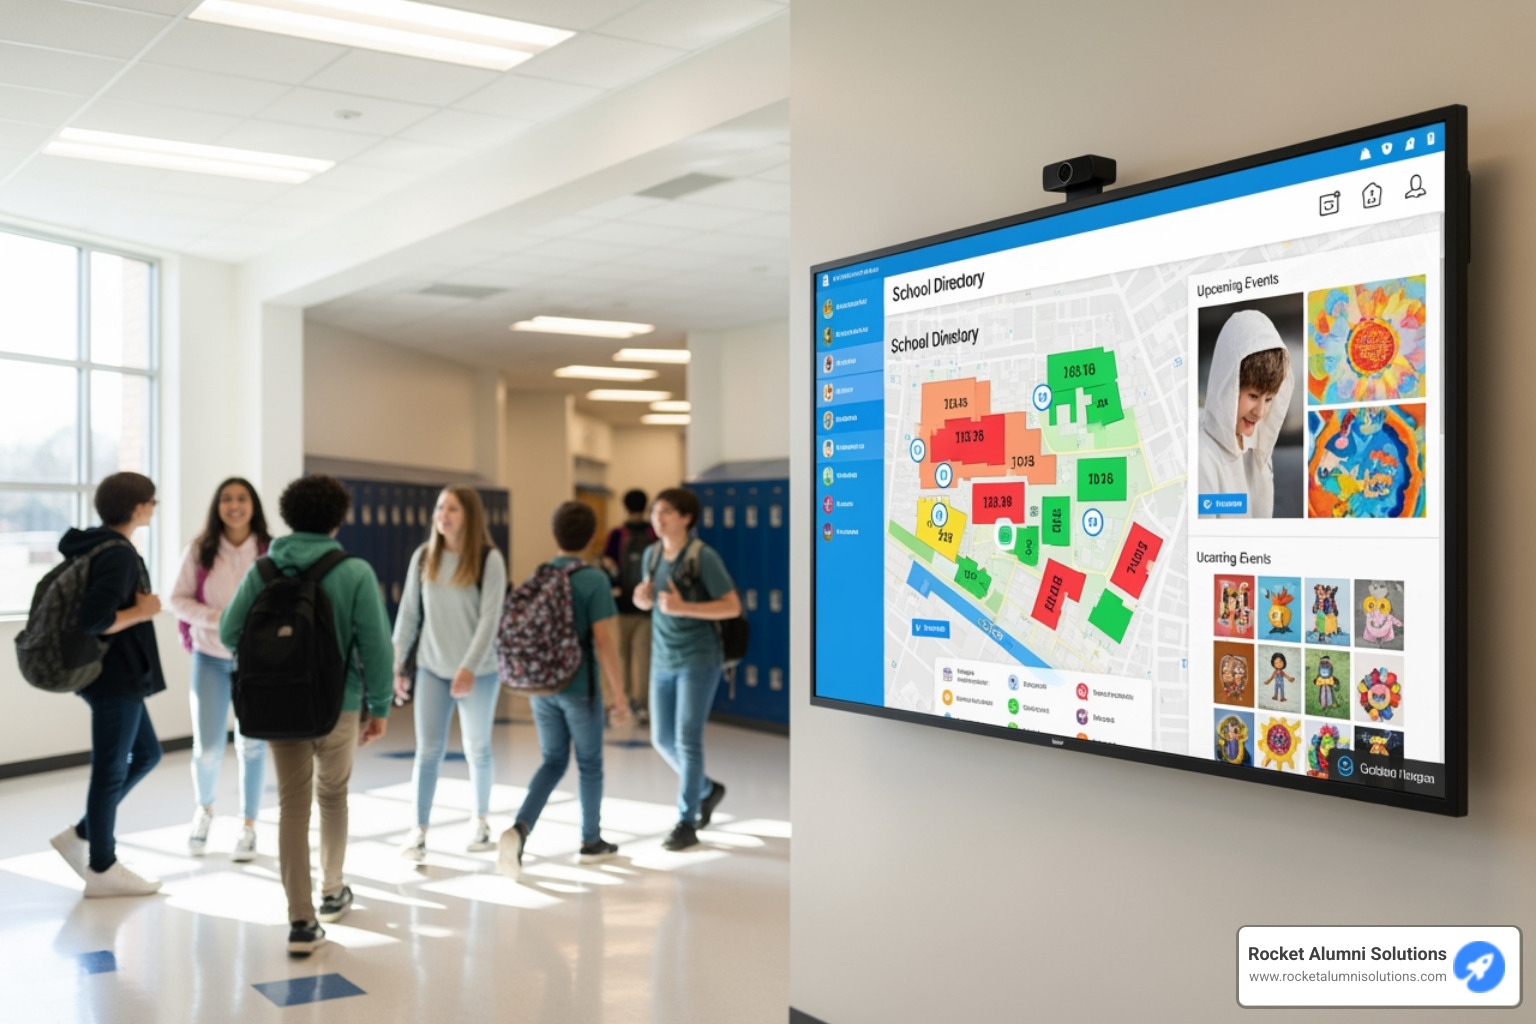
Customizable Homepage
Incorporate social media, calendars, ads, search bars, facility maps, and QR codes for mobile accessibility.
recent_actors
Unlimited Entries
Recognize community members and award-winners with unlimited media content.
account_box
Custom Profile Layouts
Layout that allow you to find the perfect combination of text, images, videos, or even a virtual trophy case.
category
Customizable Categories
Completely customizable categories to group community members in notable classifications.
swap_vert
Sorting Capabilities
All entries can be assembled by custom search filters and sorting.
auto_stories
Integrated Yearbooks
Use our animated flip book embed and partnership with yearbookscanning.com to take your yearbooks digital!
language
Embedded Websites
Input PDFs and websites from anywhere, directly onto your touchscreen display.
ads_click
Advertisment Placement
Sponsor your display with custom banners and different ad/sponsorship placement locations.
smart_display
Unlimited Media & Videos
Display all types of media in sleek gallery layouts, with no limits.
location_on
Interactive Maps
Tour your campus, display the reach of your institution's projects, or showcase college attendance.
Thank you for your amazing product, it has literally changed the trajectory of my career!
I wanted to share our veterans page with you. I actually won teacher of the year last year for bringing this program to the high school and community.
We put out Facebook posts every few months asking the community to send me photos and service records of their or family members military service. We are basically archiving every alumni who has served.
I have been given entire classes that revolve around using "the board" as we call it. The possibilities are endless. It has been a way to categorize and archive the history of our school.
We will celebrate our towns 150th birthday next year and we plan to take a mobile board downtown to showcase the history of our school for this celebration.
I also recently was the featured speaker at a district wide school board meeting and was able to showcase "the board" to everyone and received so much positive feedback.
Sweetwater High School
Sarah Davies
Quality of product & above and beyond approach
Our athletic department staff's experience with them can be summed up with a big THANK YOU!!!! We look forward to the future and I can say with confidence that everyone should have the same experience that we have had with the professionalism and care that the Rocket team has shown us.
Mesa Community College
John Mulhern
Legacy of our former athletes and teams will never be forgotten
Rocket Alumni Solutions has helped our school better share our story and history with fans, parents, students and guests. Their services provide a way for the legacy of our former athletes and teams to never be forgotten and to live on forever.
Rye Neck High School
Gino Palmieri
Versatile & dynamic product
The Rocket team has put together a versatile, dynamic product that is intuitive to use on the back end and supremely attractive to visitors. We love their work and are so glad we found Rocket!
University of Maryland
Eye-catching, user-friendly & easy
The display is so eye-catching, the ease of use is great for all generations and the ability to add/remove/change is very user-friendly and easy to navigate. Love it!
Alfred State University
Chris Boswell
Cutting-edge experience
Converting our hall of fame to digital provides a cutting-edge experience for our school community. The ability to house our hall of fame, athletics information, and performance art information in one spot has been advantageous. It feels like we are just scratching the surface in terms of value and usability. Can't wait to continue to build it out.
Traverse City Central High School
Justin Thorington
Ease of use, flexibile & responsive
We researched several platforms and selected the Rocket team because of the ease of the user interface, end-user flexibility with the design, and responsiveness of the team. Multiple department heads have access to add material and it has been wonderful to see the creativity and stories come to life for so many things we would have never imagined.
Lafayette Catholic School
Matt Buche
Real-Time Editor
From ready-to-use templates to responsive design, craft a unique online presence.
check_small
Instant Templates: Access a variety of ready-to-use designs.
check_small
Tailor-Made Content: Fully customizable to your needs.
check_small
Responsive Design: Flawless on all devices.
check_small
Personalized Style: Custom fonts & colors for your brand
Learn More
Custom Homepages
Create captivating homepages with dynamic layouts and multimedia backgrounds, making every visit memorable.
check_small
Dynamic Backdrops: Image and video slideshows.
check_small
Promote with Ease: Dedicated spaces for ads and sponsors.
check_small
Socially Savvy: Seamless social media integration.
check_small
Game Day & Events: Calendar functionality included.
check_small
Visual Storytelling: Elegant media galleries.
check_small
Find Fast: Site-wide search capabilities.
Learn More
Unlimited Folders
Organize your content with unlimited folders.
check_small
Organize with Style: Multiple layout options.
check_small
Folder Freedom: Create as many subfolders as needed.
check_small
Sort Smartly: Customizable sorting options.
check_small
Top Achievers: Auto-ranking for record boards.
Learn More
Unlimited Profiles
Build dynamic profiles with AI-assisted bulk uploads and rich media integration.
check_small
AI-Assisted Uploads: Effortless bulk uploading via .xlsx, .csv.
check_small
Edit in Bulk: Streamlined bulk editing.
check_small
Layouts for All: Diverse layout options.
check_small
Smart Resizing: Automatically adjusts to content.
check_small
Media Rich: Integrated image/video galleries.
check_small
Record Boards: Highlight achievements and records.
Learn More
Integrations
Connect with social media, embed videos, and link seamlessly to external content, creating a cohesive digital ecosystem.
check_small
Socially Connected: Easy integration with popular social media.
check_small
Stay Scheduled: Calendar integration for your organization’s events.
check_small
Video Integration: Supports videos from YouTube, Vimeo, HUDL, Facebook.
check_small
Link Effortlessly: Direct connection to your existing website.
check_small
Expand Your Content: Embed external links with ease.
Learn More
Robust Security
From encrypted data transmission to regular security updates, we prioritize your digital safety at every step.
24/7 live chat support & comprehensive help center
domain_verification
Custom Domain Name
Look professional with a custom domain
domain_verification
Enhanced Link Previews
Better engage with your community through enhanced link previews when sharing links on social media
mobile_friendly
Mobile-Friendly
Your site will automatically look great on any device
import_contacts
Memory Lane
Upload digital yearbooks & class composites
subscriptions
Video Versatility
Upload mp4/mov or link YouTube, HUDL, Vimeo, Facebook
library_add
Image Versatility
Supports png, jpeg, or svg
group
Tiered User Access
Customizable permissions and roles to suit diverse needs
gallery_thumbnail
Media Galleries
Display images and videos in a sleek gallery layout.
add_photo_alternate
Free Custom Graphics
Request custom static/motion graphics from our design team
draw
Advanced Design Features
Unleash your creativity with effects and animations
text_fields
Custom Fonts
Over 1500 Google Font options or upload your own!
accessibility_new
ADA WCAG 2.1 AA Accessible
From screen reader compatibility to keyboard navigation and contrast optimization, we ensure your website is navigable and understandable by all users
qr_code_scanner
Custom QR codes
Instantly connect to external websites
It's that easy
Ready to go? Let's set up your intro meeting.
Meet with our team
arrow_forward
More Use Cases
However you use the Rocket, our platform just works.
Leverage the full potential of our touchscreen technology to offer engaging, informative, and interactive experiences tailored to each client's unique needs and audiences.